The Arduino IDE is a wonderful tool to program your Arduino Boards, the ESPs as well as a few ARM micro-controller boards. It allows you to write your code and upload it to your micro controllers.
But if you have ever used or seen someone using VSCode or the Visual Studio Code from Microsoft. I can assure you that, you would never ever want to use Arduino IDE ever again. PlatformIO with VS Code is a perfect combination for programming your micro controller boards, be it Arduino UNO, Arduino Mega, NodeMCU, or the ESPs.
Downloading and setting up Visual Studio Code
Step 1:
In order to use VSCode for programming your micro controller boards, you need to install the Platform IO Extension for VSCode.
So first of all you need to download Visual Studio Code from it official website. It’s a free and open source software and I personally use it for every program I code. Be it Python, HTML, CSS, C, or
the Lua Script. So step 1 is to download VS Code, and then install it. There are different version available for
Linux, Windows and Mac.
Step 2:
So now, that you are done downloading and install VS Code. You need to install the Platform IO extension for VS Code.
Procedure to install and enable Platform IO in VS Code for Arduino
1. Open up the Visual Studio Code Application
As soon as the installation is done. Open the Visual Studio Code application. The VS Code can not only be used for Arduino, but also for Python, HTML, CSS, JS, Java, and what ever programming language there is.
2. Navigate to the “Extensions” menu in the side bar on the left and search for PlatformIO
Open the Extensions menu from the side bar, or use the shortcut “Ctrl+Shift+x”. Next you will need to search for “PlatformIO” in the search box and click on the tiny install button.
Just wait for a few minutes for the PlatformIO extension to install and then restart the VS Code application. Now, you are ready to use it to program your micro controllers.
Importing Libraries and Boards
Remember, you had to manually add 3rd party boards like the NodeMCUs or ESPs in the Arduino IDE from the preferences settings in the IDE. Well, you no more need to do that unnecessary thing.
We will use the basic Arduino UNO to show you how to get things done. We will make a simple LED blinking project.
Step 1:
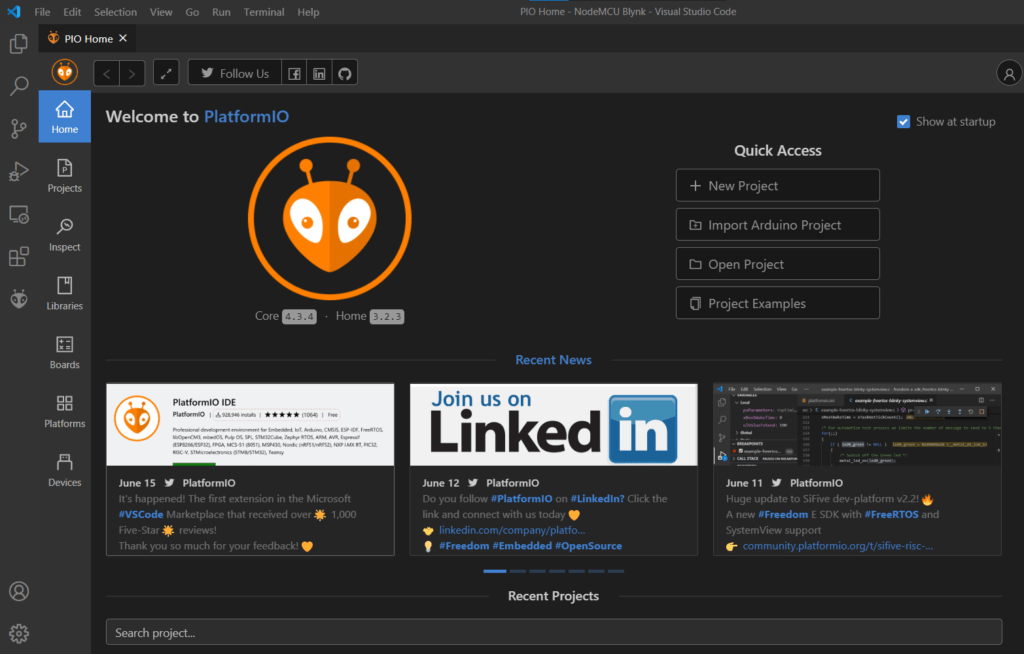
After your PlatformIO extension is installed, you should be able to see an Alien icon just below the extensions icon in the left sidebar. Clicking on it should take you to the PlatfromIO Home in VS Code.
Click on
the New Project button, a new window will appear.
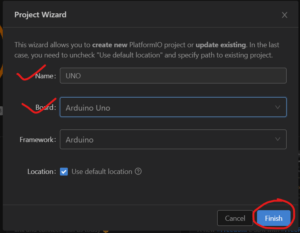
Step 2:
Fill in the Name of your project.
Select the Board from the list of boards.
And
then click Finish.
It usually takes a few minutes to download the essentials for that particular board and then you are good to go.
In the Arduino IDE your code was saved in files with and .ino extension. But in here, it will be saved as .cpp. Yeah, thats the file extension for C++. Don’t worry, you need not learn C++ for this. All the syntax and coding style remains same as in the Arduino IDE. But there are a few tiny changes to be made.
Understands file structure in VS Code.
First of all, lets have a look at the files in our project.
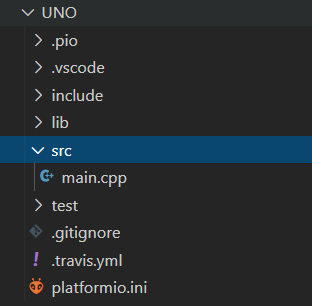
As it can be seen, there are a number of files in project UNO’s workspace.
The main file that contains all of your code is the main.cpp file.
Another
file of importance is the last file platformio.ini. This file is used for configuring all the various parameters for communicating with the board,
for example the baud rate. Well will cover that later.
Now, click on the file main.cpp and you should see a few lines of code already written for you. Just like in the Arduino IDE.
#include <Arduino.h>

void setup() {
  // put your setup code here, to run once:
}

void loop() {
  // put your main code here, to run repeatedly:
}
You can see that there is a new line in the code, just before your void setup().
#include <Arduino.h>This is all the difference in the code you write in the Arduino IDE and the PlatformIO IDE. Just write the code to blink the onboard LED, or use the one below, and then click on the upload button![]() at the bottom of the application. And that should work like a charm.👌
at the bottom of the application. And that should work like a charm.👌
#include <Arduino.h>
// the setup function runs once when you press reset or power the board
void setup() {
  // initialize digital pin LED_BUILTIN as an output.
  pinMode(LED_BUILTIN, OUTPUT);
}

// the loop function runs over and over again forever
void loop() {
  digitalWrite(LED_BUILTIN, HIGH);   // turn the LED on (HIGH is the voltage level)
  delay(1000);                       // wait for a second
  digitalWrite(LED_BUILTIN, LOW);    // turn the LED off by making the voltage LOW
  delay(1000);                       // wait for a second
}
Hope you learnt something new. Would you also like to know what’s Blynk and how to use it? Or may be learn how to setup your own website for free.
See you around 😎 Do care to share and comment.